Thursday 26 October 2017

Painting 54mm plastics - a duffer's guide part 4

 
Once the paint is dry I apply a coat of varnish.  As I like a glossy 'toy soldier' look I use either Gloss or Satin varnish by Ronseal or it's B&Q equivalent.  I have taken to using satin recently as it does in fact give quite a glossy finish and dries quickly.  A second coat can be applied - not least as I'll have missed bits first time round.  Make sure to put plenty on bendy extremities like musket barrels and swords.

Some figures look better with a bit of pigment in the varnish - such as these very well detailed CTS North Koreans.  Rather then clear varnish I used Ronseal Satin Light Oak.  More expensive products are available but as far as I can see they're not any more effective.
Finally I stick a bit pf magnetic sheet to the bottom of the base.  Why?  Because I use thin steel movement bases and I like the figures to be secure...
...like this!

That's the end of this series of posts  - unless there's anything you feel I didn't cover.

Monday 23 October 2017

Painting 54mm plastics - a duffer's guide part 3

Firstly, thank you for the comments and questions resulting from parts one and two.

The gesso having dried to a nice matt finish, we can now proceed with the actual painting.
There is usually a base colour to apply, for example white for the 18thC French we'll meet in a moment or beige to represent the faded olive on these North Koreans.  Slap on the base coat with a big - size 5 or so - brush.
My standard for painting is something like the Britains Deetail range.  These WW2 Americans featured in a previous post - only the chap in the middle is an actual Deetail figure (with his original paintwork).
I ditched enamel paints back in the 1990s and now use acrylics.  While I mostly use Vallejo paints, I look out for cheaper paint for the colours which I'll use a lot of .  The 'Crafter's Choice' range can be found in The Works for £1 each.
 While the base coat dries be thinking about the 'detail' painting.  I use pretty basic references such as the splendid Funcken books

Here are some 18th Century French - the white base colour (applied over the black gesso) has been augmented by brown for muskets and packs, tan for knapsacks, flat flesh for hands and faces and in the case of this regiment, green for cuffs and tunics.  They'll also get gunmetal bayonets, swords and musket barrels and black to touch in shoes and hats.  All this can be done with a single brush of size 0 to 2.
 The NKPA getting similar treatment.
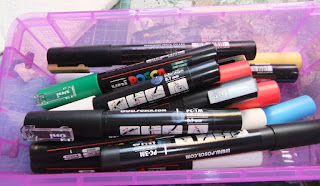
 My 'trademark' touch is the mad staring eyes I give all my figures.  Apply a white stripe and a dot of black.  This can either be done with a fine brush and a cocktail stick, or you can cheat and use...
...paint pens.  These are the lazy wargamer's friends.
 A different batch of NKPA - this time in as yet unfaded uniforms.
The French again.  Both eyes and the gold hat trim were added with paint pens.
The bases are now painted - I generally paint them green using Dulux matt emulsion paint.  Woodland Fern 1 in fact, which I have mixed to order in a 1-litre tin.

Next - varnish and finishing.

Saturday 21 October 2017

Battle-weary Beaufort

A fitting follow-up to the Blenheim, latest to emerge from the Partizan 'plane purchase pile is this Beaufort.  Never having owned or built a Beaufort I had to do a bit of research to establish the maker of this kit.  I think it is the Frog (or Novo) Mk1.
The model was in good shape and though the paintwork is very tatty and worn looking, I rather like the effect!

Friday 20 October 2017

Painting 54mm plastics - a duffer's guide part 2

Once the figures have dried off, I glue them to mdf based using PVA.  The easiest and quickest way is to dunk the figure's own base in the tub of PVA, making sure the adhesive covers the base.  Scrape off some of the surplus PVA on the side of the tub and press the figure on to the mdf.  Don't just put a dab of glue on the bottom of the figure base - it won't be secure.  The figures above are the CTS NKPA we met in the previous post.
Once the PVA has dried - I leave mine for 24-48 hours - brush on a coat of artist's gesso.  This is a strange substance which artists use for sealing canvas and is available in both black and white.  Having tried both I prefer the former.  Be warned that despite being acrylic based, gesso is a bit smelly - so keep a window open.
Brush it on generously.  When dry go over the figures again touching up bits you've missed and give a second coat to vulnerable extremities like heads, rifle barrels, bayonets and swords.  These figures are MARS Soviet Motor Rifle Troopers.

When the gesso has dried we can finally crack on with the actual painting!

Wednesday 18 October 2017

Painting 54mm plastics - a duffer's guide part 1

As regular readers will know, I have never laid any claim to any great talent on the painting front.  Though I can churn out toys in reasonable numbers.  But as Stalin said "quantity has a quality all of it's own."  And he should know.
Here then, following a flood of requests from at least three readers, is part one of my duffer's guide to painting 54mm plastic toy soldiers.  This post deals with preparing the figures for paint, which represents at least half the work.
Clean up the figures, trim away any excess plastic and if required trim the bases to fit the stands you'll be using.
Wash the figures.  Put the kettle on and while it boils run a basin of warm water with washing up liquid.
 Fill a bowl or mug with boiling water and another with cold water.
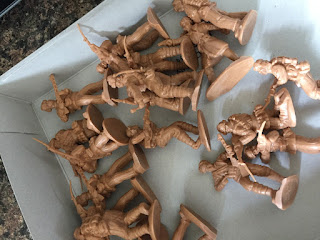
Many figures will have extremities which need straightening.  The bayonets of these CTS North Koreans are typical examples.
Using a set of tongs - ours are bamboo and normally serve to retrieve errant bakery products from the toaster - dunk a few figures at a time into...
 ...the boiling water.  The bent bits will straighten all by themselves.  This is also an opportunity to bend arms or legs to alter figure poses.
 Dunk the now very warm figures in the cold water for a few seconds.
Then chuck the figures in the soapy water.  Swiz them round a bit in the water as this will help de-grease the plastic.  I gather that some use a dishwasher for this purpose but ours never seems to have room!
Rinse off the soap using a colander and the kitchen tap..  Then tip them back in the basin and rinse off again.

 Finally tip the damp figures onto a tray covered with a clean towel and leave overnight to dry off.
After all this effort, and bearing in mind the kettle has boiled, it's now time for a nice mug of tea!  Make sure there are no toy soldiers in the cup first...

Monday 16 October 2017

Birmingham Toy Soldier Show 2017

 Having missed this show in 2016 (I was in France instead), I was pleased to be able to attend it last Sunday.  As well as chatting to friends - John Curry, Mike Lewis, Anthony Morton - I picked up a few gems.
The six French gunners are nicely painted metal figures and set me back £20.  I have simply added my usual mdf bases and a coat of varnish.  They are posed here with a couple of  Armies in Plastic guns.

Eight nice cavalry were a mere £16.  Again I have based and varnished them after repainting the flaky swords.  The four above are Timpo, below are even rarer Dulcop figures.

Friday 13 October 2017

Rapidly reorganising a rowdy rabble of Russians

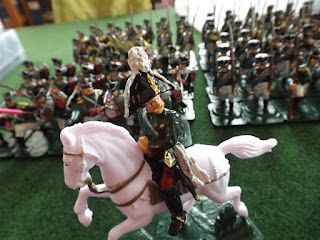
In the aftermath of the Leipzig game I unpacked and then re-boxed all the toys I'd taken.  Packing up after a game - especially when it's mostly done by other people - always results in a degree of disorganisation.  None of this matters, though, as long as the toys are safe.  While I had the table covered in toys I had the presence of mind to take a few photos.  I'll leave it to you to decide if you are inspired or appalled! above  - Barclay de Tolly and Wittgenstein (great Russian names!) with four regiments of line infantry.
Barclay is a Supreme plastic figure and has real attitude.
Order being established.  One of these A4 size boxes accommodates two 18-man regiments.

As you might imagine I have a few of these boxes, so labelling them seems like a good plan.
Russian staff in their box but no doubt continuing the post-battle debate.

Monday 9 October 2017

Bunker Hill

As I'm already a big fan of the Command & Colours series of games, when I heard that Tricorne, the version covering the American War of Independence had been published I didn't think too hard before placing my order.  As regular readers will know, I view C&C as a toy soldier game and play the Napoleonic and ACW versions with 15mm toys and the Ancients wersion with 25mm toys - all on Hexon terrain with it's 4-inch/10cm hexes.
All very well, but I don't have any suitable toys for AWI and any I do paint will be in 54mm.  Then I remembered my Irregular 2mm blocks which I originally acquired about 15 years ago for use with Richard Brooks's Minischlacht and Terrible Swift Rule games.  By re-purposing most of the figures I had already painted I managed to cobble together enough troops to play the (chronologically) first scenario.
Here is the game setup.  Graham led the wicked rebels (left) while John commanded the colonial oppressors.
Some of the terrain was a bit of a lash-up.  Here are the Continental earthworks on Breed's Hill.  And I forgot some of the actual hill.  Ah well.
The British left.  While the bases of the Continentals were edged in pale blue, the Brits used red.  Light troops have a green stripe on the left of the base, regulars blue, militia yellow.
The woods were made from cork tile with green felt glued atop.  They looked surprisingly effective.

Continental riflemen skulking in Charleston.
HMS Lively - a 20-gun vessel bombarded Charleston at one point.  This is a 30+ year-old 1/3,000 model kindly provided by John.
As the enemy were largely dug in, the Brits decided to advance.


So how different is Tricorne from other C&C games?  Surprisingly so.  It does a very neat job of replicating the flavour of linear warfare.  Infantry unite exchange fire in the hope that the enemy will run away!  Rolling a flag on the combat dice means, as usual, that the target must retreat (unless supported, with leader etc) but then the retreating unit rolls again.  This time a failure to roll a flag means that the unit keeps on running.  Not that you'd know it from my bungled explanation but it does get pretty tense!
Play proceeded fairly slowly as we adapted to the new game systems and troop types.  We were hampered by the absence of Martin and Jerry who - the only ones who can be relied upon to read and understand rules!  We wound up at a convenient point with the Brits trailing by 2 banners to 4 and accepting that they weren't going to win.